In this week’s Episode 3 of our “How-To” video series, we delve into the world of headset installation and selection. We’ll be focusing on Funn MTB Descend Headsets, which come in many sizes and specifications. Stay tuned as we will share with you how to select and how to install the right size headset for your bike.
Choosing and installing the right bike headset is a detailed task, especially for those new to bicycle mechanics. This process requires precise measurements, understanding your bike’s specific requirements, and mechanical skills. Whether upgrading, replacing, or assembling a new bike, selecting the correct headset is crucial for performance and safety. This guide will walk you through choosing the right headset and the headset installation process, equipping you with the knowledge for a smooth, precise riding experience.
How to Choose the Right Bike Headset?
Step 1: Determine the Type of Headset
Threaded or Threadless
The first step is to determine if your bike requires a threaded or threadless headset. Threaded headsets are typically used with quill stems, whereas threadless headsets are employed with modern clamp-on stems. This blog will specifically focus on threadless headsets, which are commonly adopted in modern mountain bikes and road bikes.

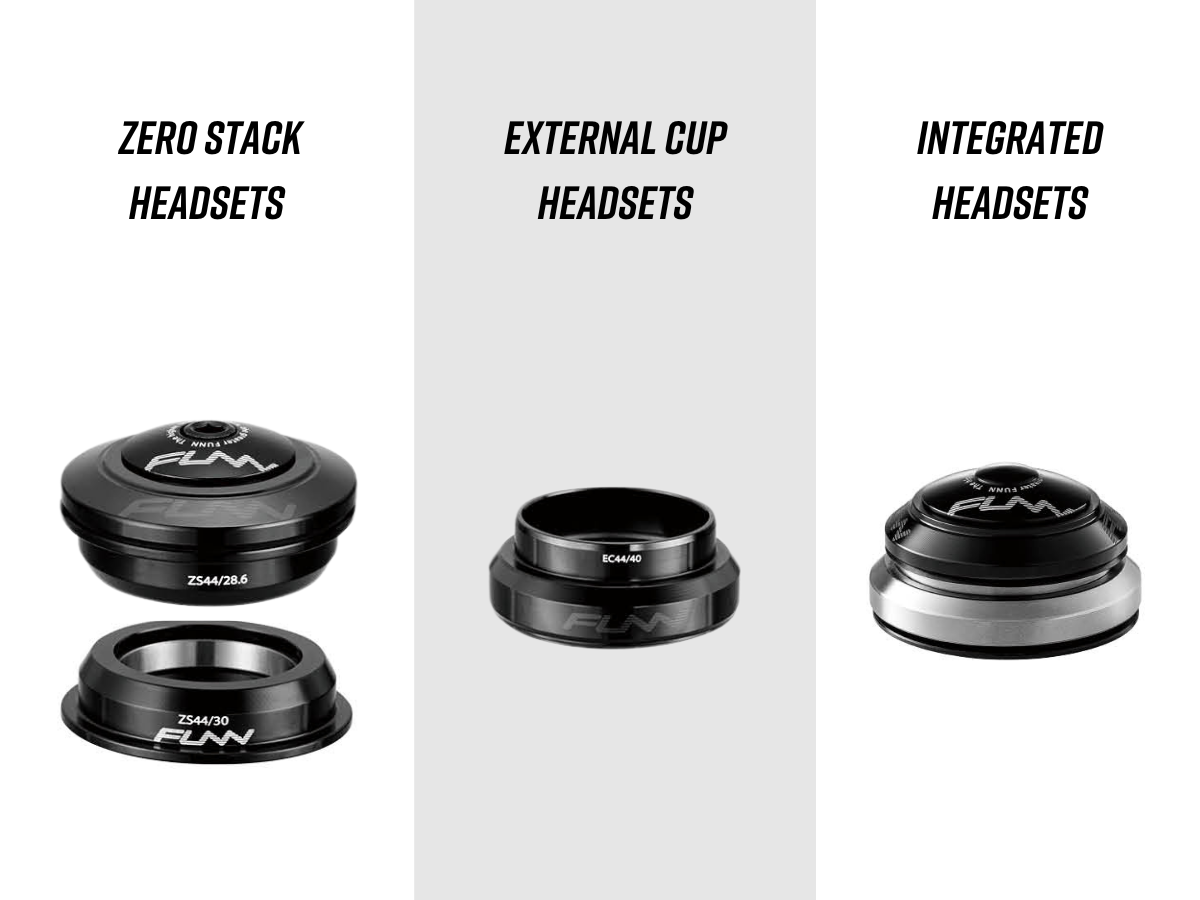
Integrated, Semi-Integrated, or External
Integrated Headsets
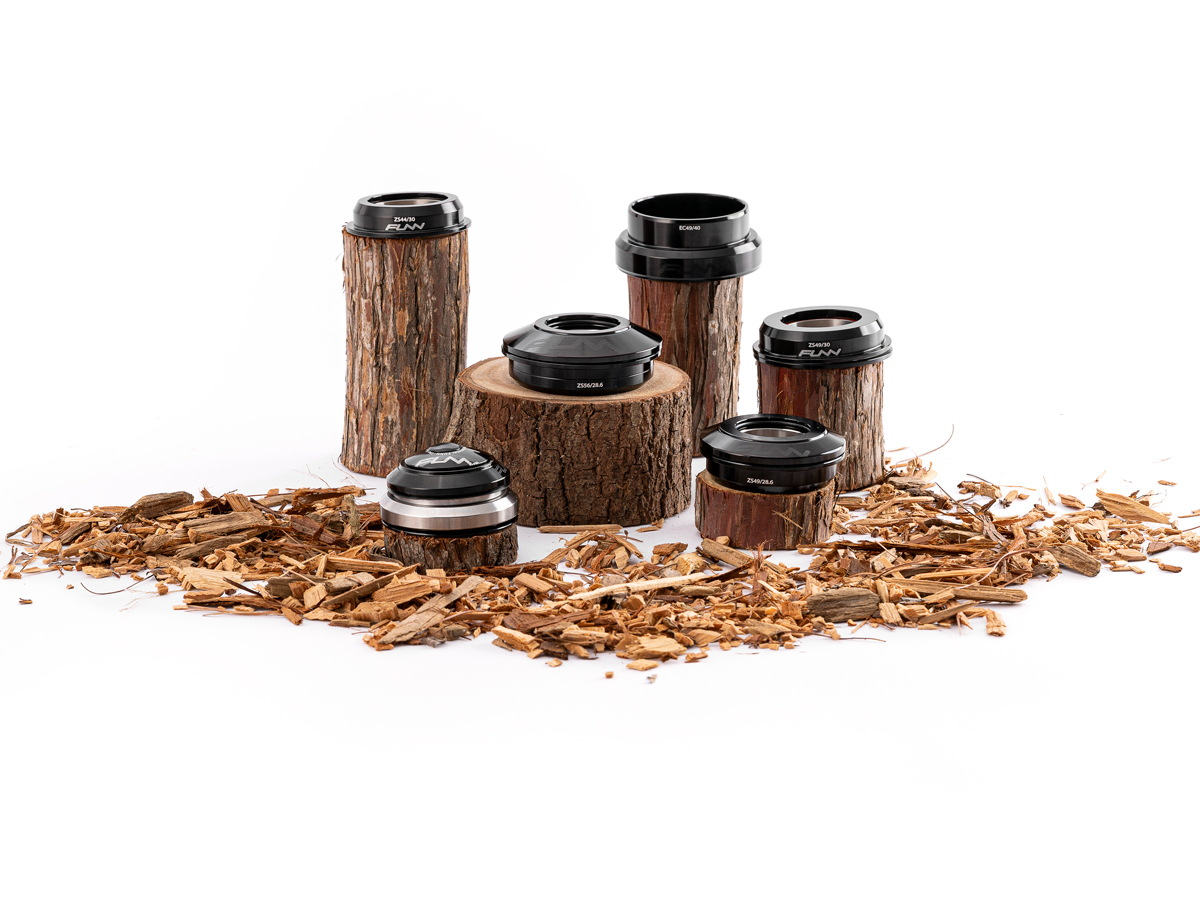
Integrated headsets, like our Descend-Integral, have bearings that sit directly in the frame, eliminating the need for additional cups. This design offers a clean, streamlined appearance and simplifies installation. Ideal for modern bike frames, integrated headsets contribute to a lighter overall bike weight and are commonly found in high-performance bicycles.
Semi-Integrated (ZERO STACK) Headsets
Semi-integrated, or zero stack, headsets have cups that are pressed into the frame but do not extend beyond the head tube. This design blends the aesthetics of an integrated system with the versatility of traditional headsets. They provide a slightly easier installation process compared to external headsets and are popular in many contemporary bicycle designs. An example from our product range is the Descend ZS Model.
External CUP Headsets
External headsets, like our Descend EC model, feature cups that protrude outside the frame, accommodating the bearings. This traditional design is known for its durability and ease of maintenance. External headsets are compatible with a wide range of bikes and are particularly favored for their robustness in mountain biking and other heavy-duty cycling applications.
Step 2: Choose the Bearing Types
When selecting a bike headset, the bearing type is a crucial consideration. The main types of bearings used in bike headsets are ball bearings, angular contact bearings and needle roller bearings. Each type has its unique features and advantages:
Type 1: Ball Bearings
Ball bearing headsets are a traditional and time-tested choice, known for their serviceability and adjustability. In these headsets, loose ball bearings sit in a cup in the headset and are secured by a cone-shaped component. This design allows for precise adjustments to bearing tension, making it possible to achieve the perfect balance between smooth steering and minimal play. Common in older or more traditional bicycles and favored by those who prefer the ability to fine-tune their headset tension.
Type 2: Angular Contact Bearings
Angular contact bearings in bike headsets deliver precision and robustness, essential for high-intensity cycling. Typically sealed as cartridge bearings, they adeptly manage both radial and axial loads, offering riders enhanced steering accuracy and durability. This makes them particularly suitable for those who demand the utmost in handling and reliability under varied riding conditions. Popular among high-performance cyclists, angular contact bearings stand out as the go-to choice for both enthusiasts and professionals who prioritize exceptional handling and steadfast performance.
Type3: Needle Roller Bearings
These bearings use small, cylindrical rollers that provide a large contact area. Good for handling higher loads and offering a compact design. Less common but can be found in some high-load applications, like downhill or cargo bikes.
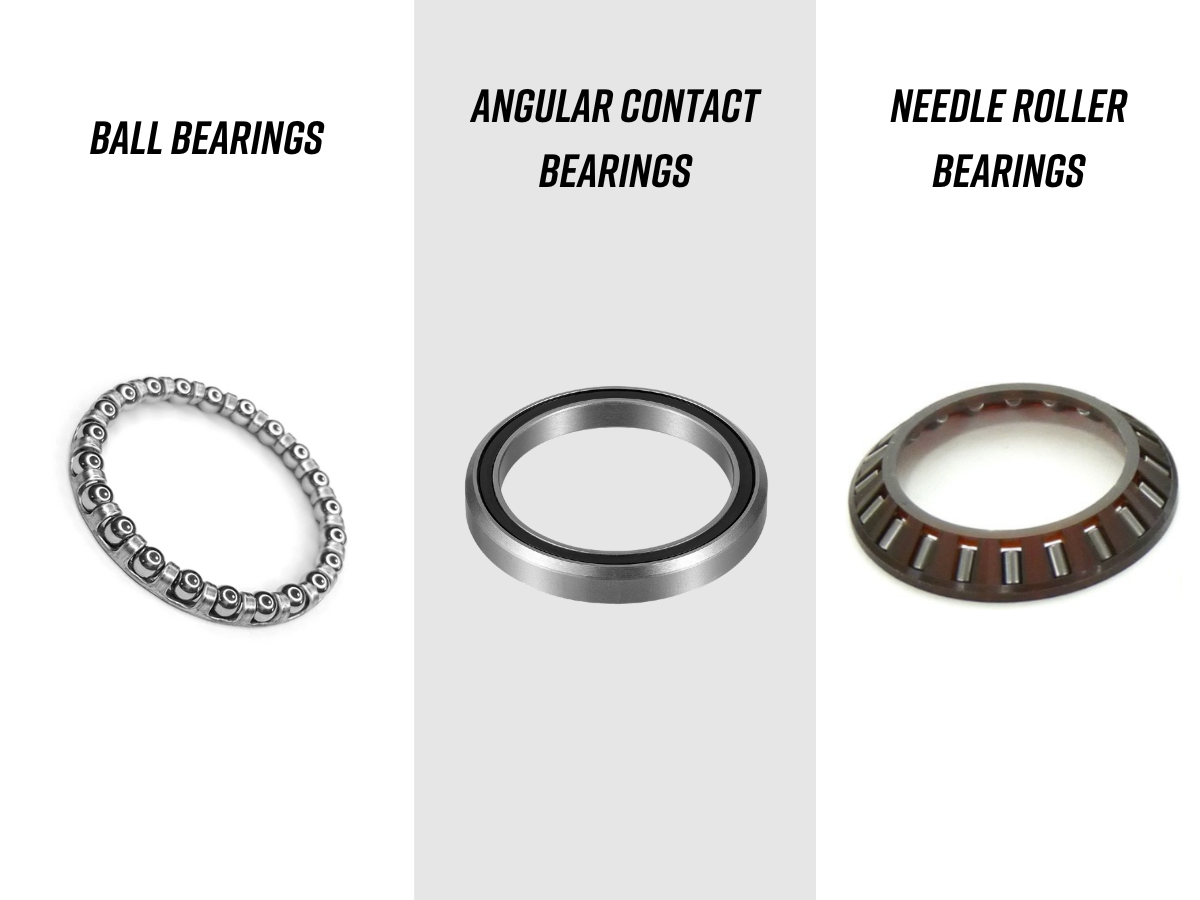
From our collection, the Descend headset utilizes the angular contact bearings, these bearings are uniquely designed to handle complex loads while providing easy maintenance.
Step 3: Determine the Headset Size
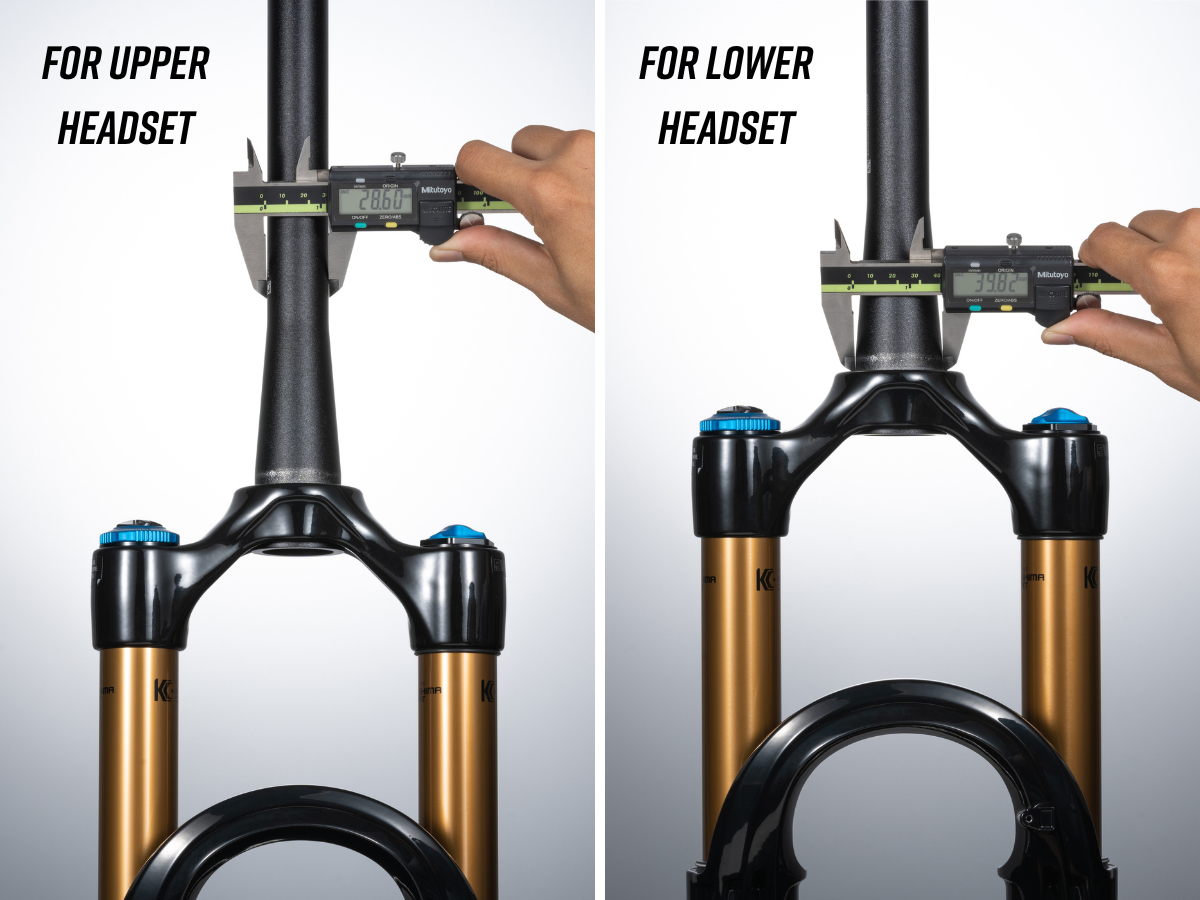
Steerer Tube Outer Diameter Measurement:
Utilize a caliper to accurately measure the outside diameter of the steerer tube’s upper portion to determine the correct size for the upper headset cup. Similarly, measure the crown race area at the lower end of the steerer tube to ascertain the appropriate size for the lower headset cup.
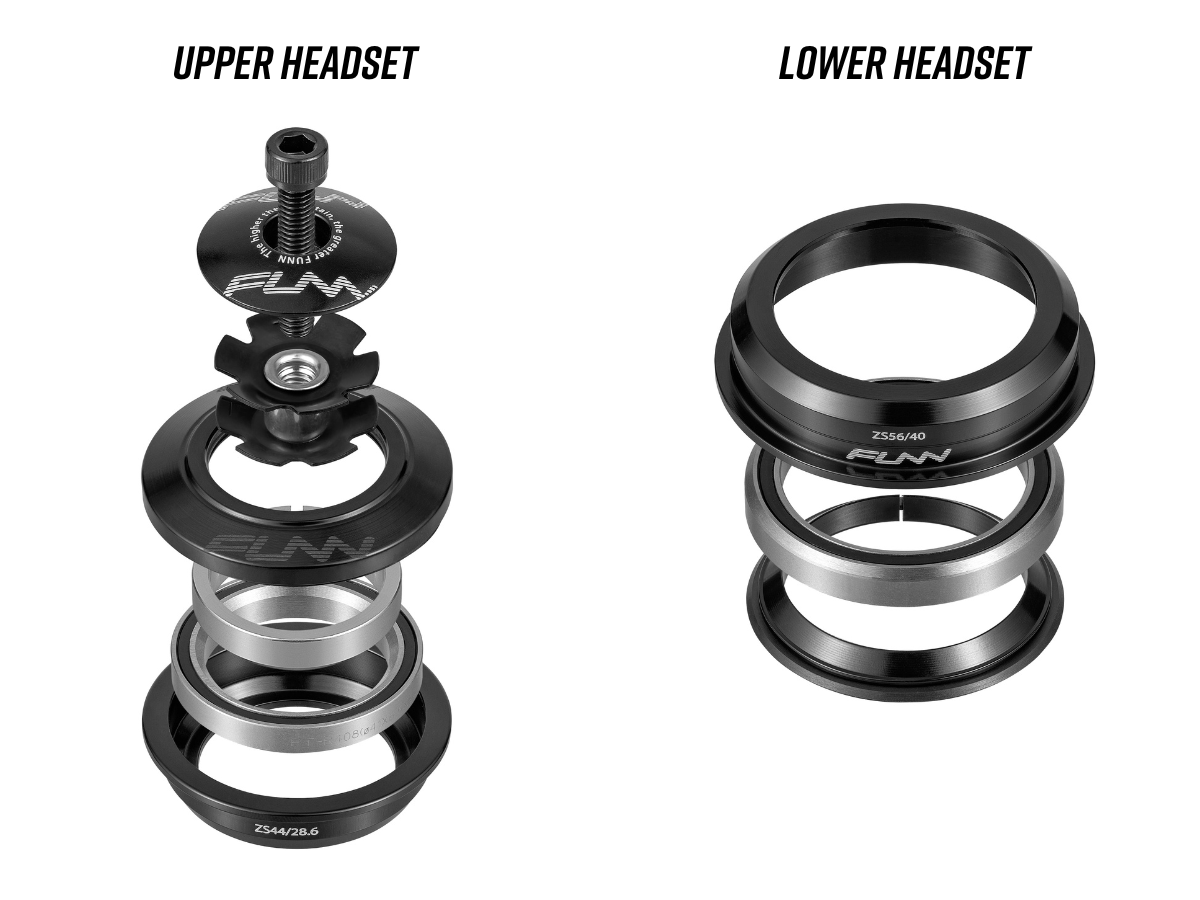
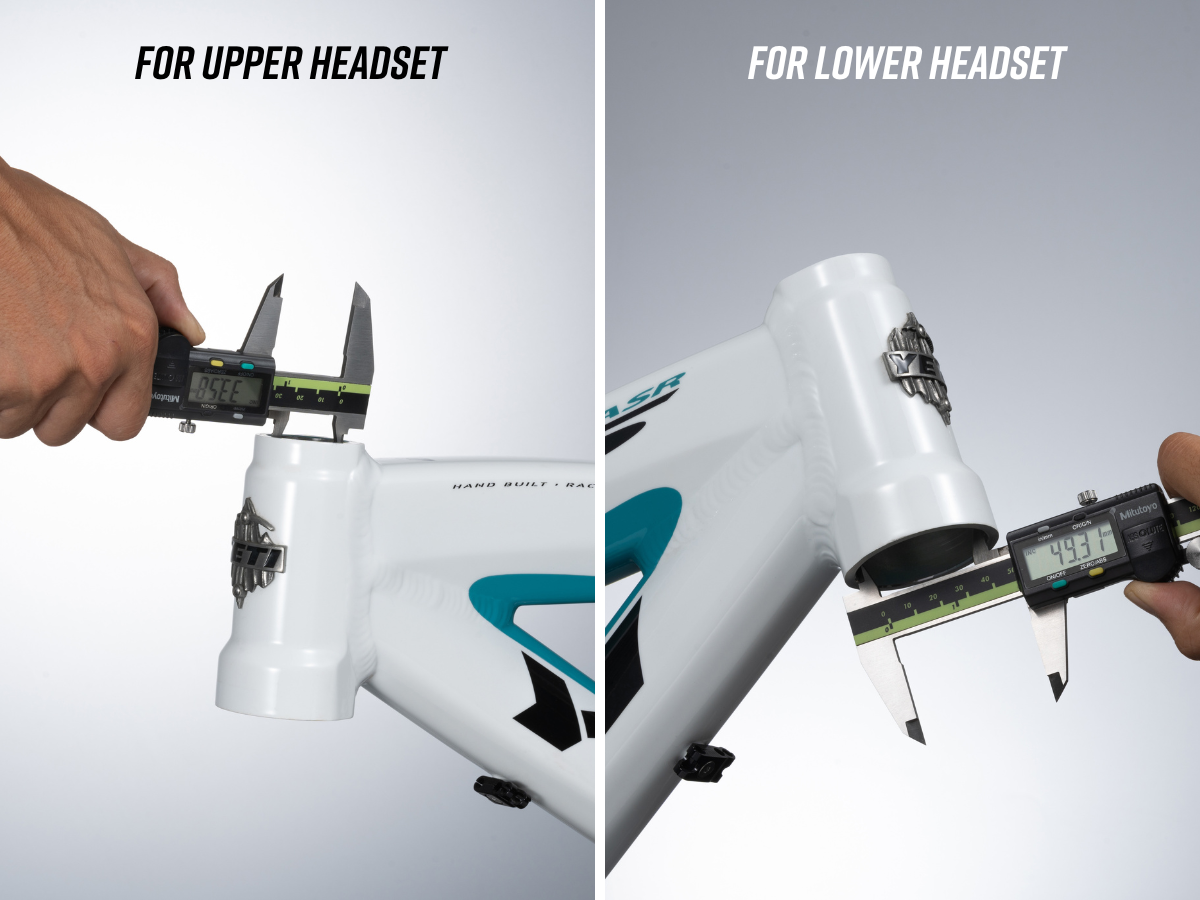
Head Tube Inner Diameter Measurement:
To measure the head tube for headset installation, accurately measure both the upper and lower sections with a caliper. The inner diameter at the top of the head tube determines the size needed for the upper headset cup, while the measurement at the bottom specifies the size for the lower headset cup.
The length of the head tube is also a critical consideration; if it’s too short, there may not be sufficient space to properly accommodate the stem.
Step 4: Choose the Right Headset
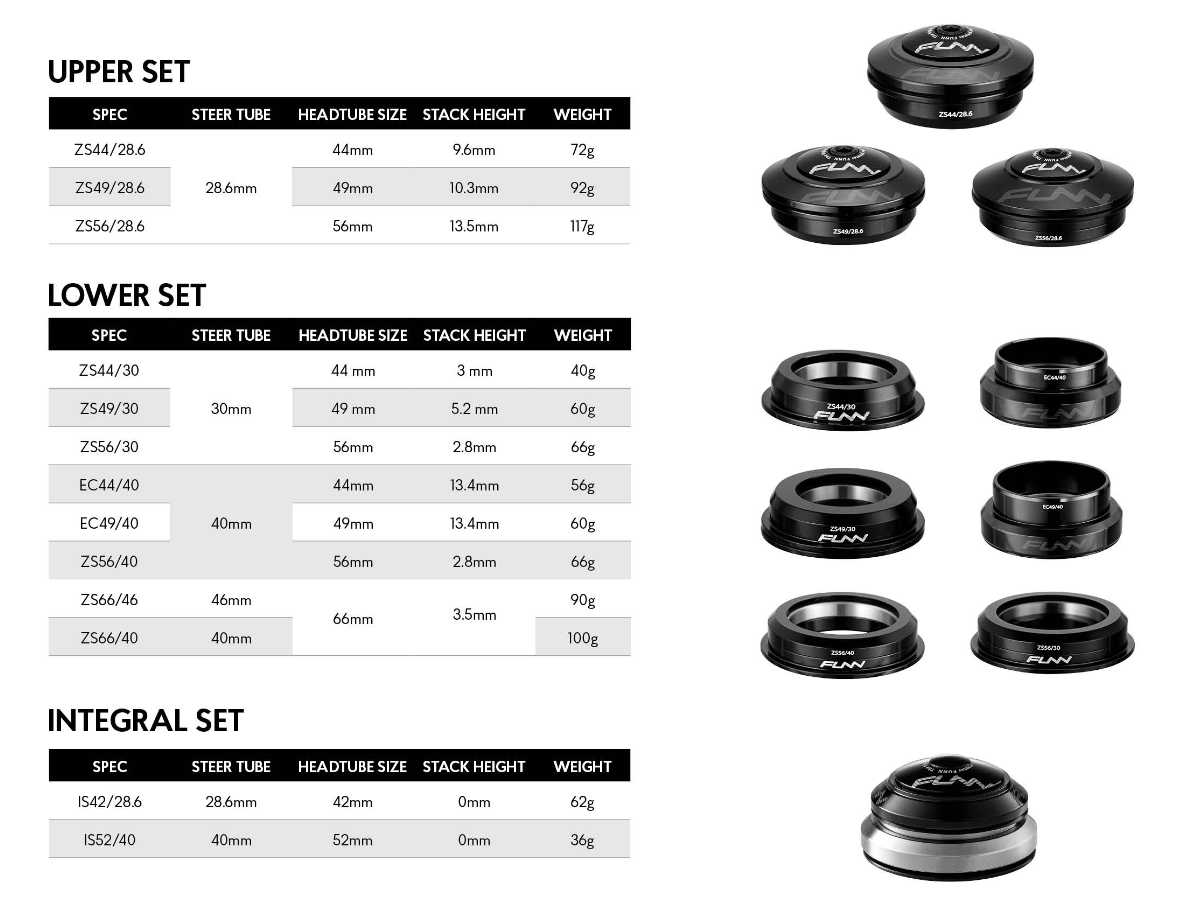
With the head tube and steerer tube sizes measured, it’s time to find the right headset. Utilize the Standardized Headset Identification System (S.H.I.S.) to align your measurements with the appropriate headset type for your frame and fork. Additionally, consulting your frame manufacturer’s specifications can guide you in finding the correct headset model.
For the complete list of Funn Descend headset models and further details, please refer to the specific section below.
Bike Headset Installation: A Step-by-Step Guide
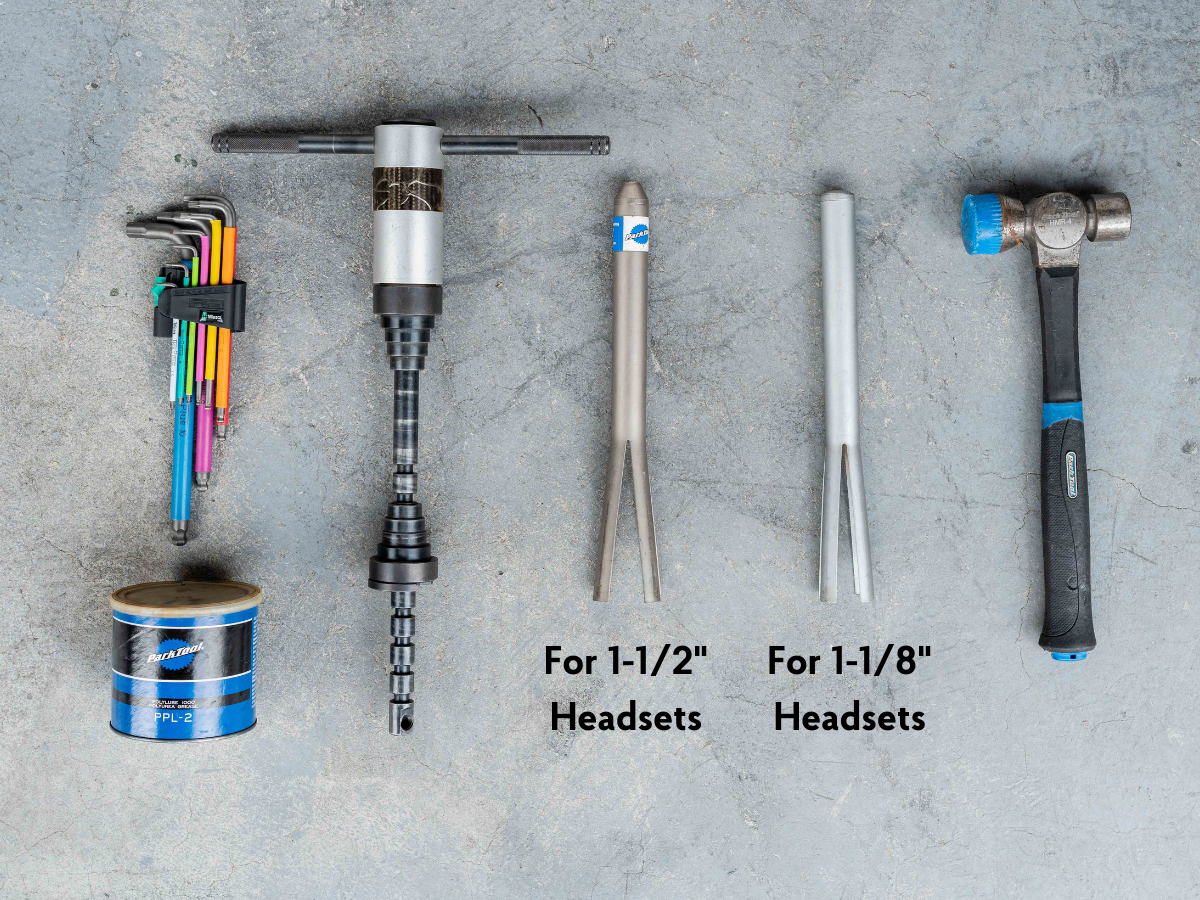
Step 1: Prepare the Tools
- Headset press
- Allen keys
- Grease
- Hammer
- Headset cup removal tool (if replacing a headset)
Step 2: Remove the Old Headset (If Applicable):
First, detach the bike’s stem and fork. Then, using a headset cup removal tool, proceed to push out the old headset cups from the frame.
Step 3: Press in the New Cups:
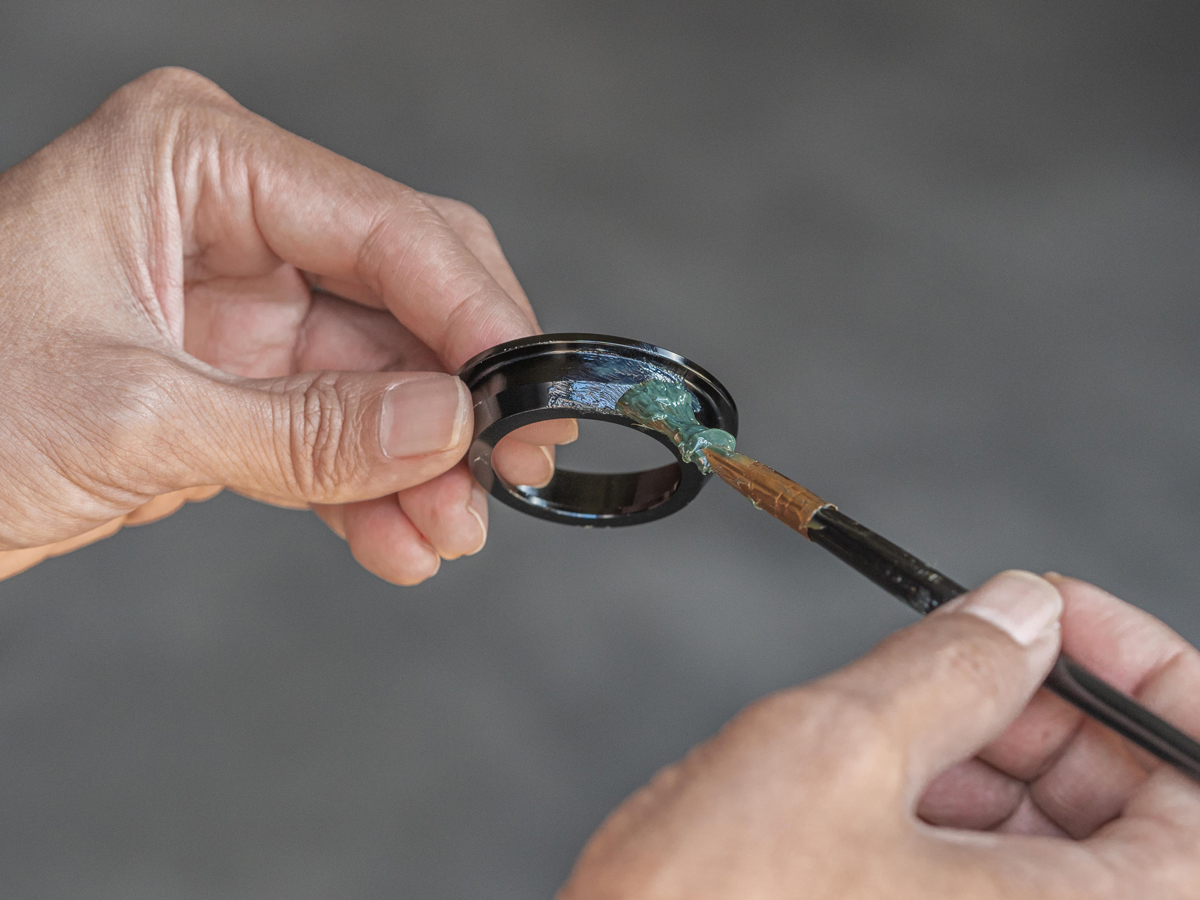
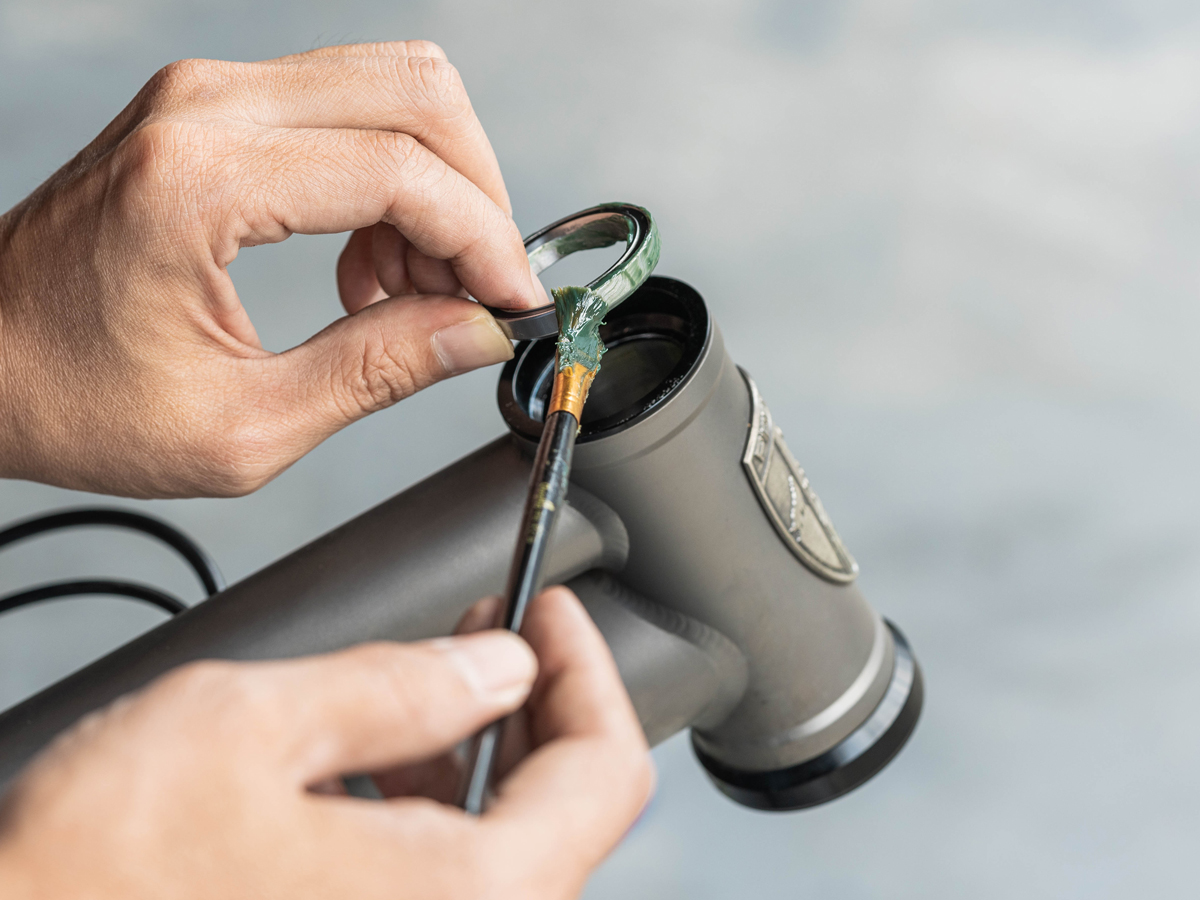
When installing the new headset cups, start by applying a thin layer of grease to both the inside of the head tube and the outer surface of the headset cup.
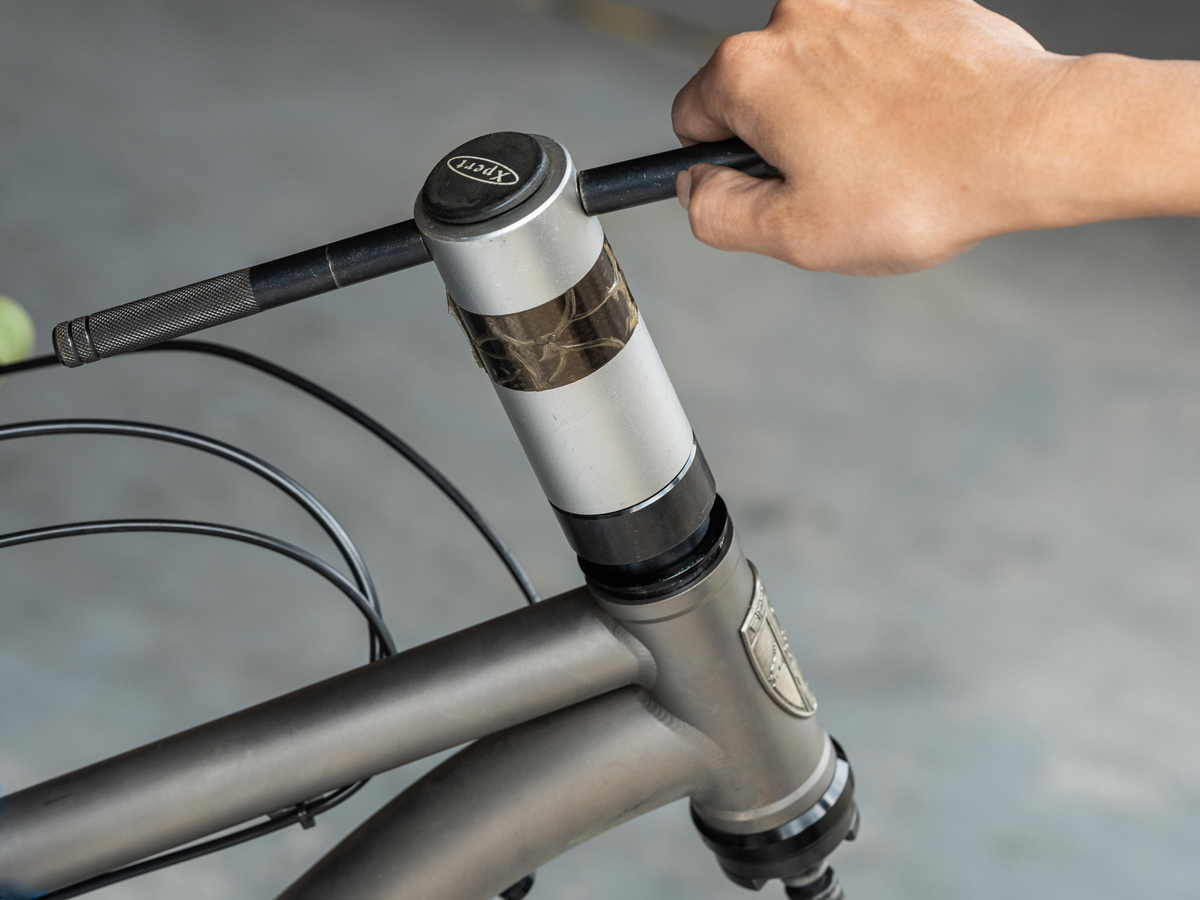
Carefully position the new cups, and use a headset press to gently and evenly press each cup into the frame. It’s advisable to press in the upper and lower cups separately, ensuring they are properly aligned.
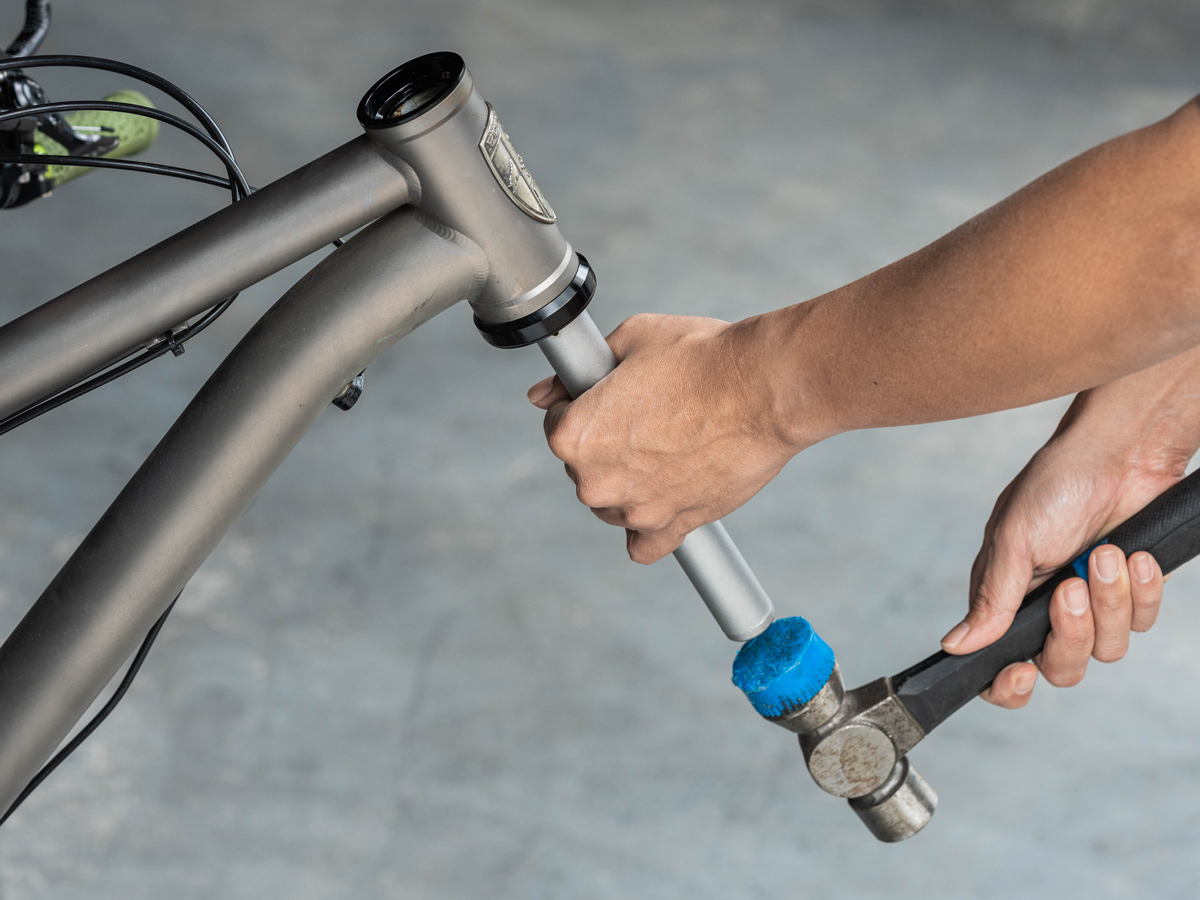
Step 4: Install the Fork:
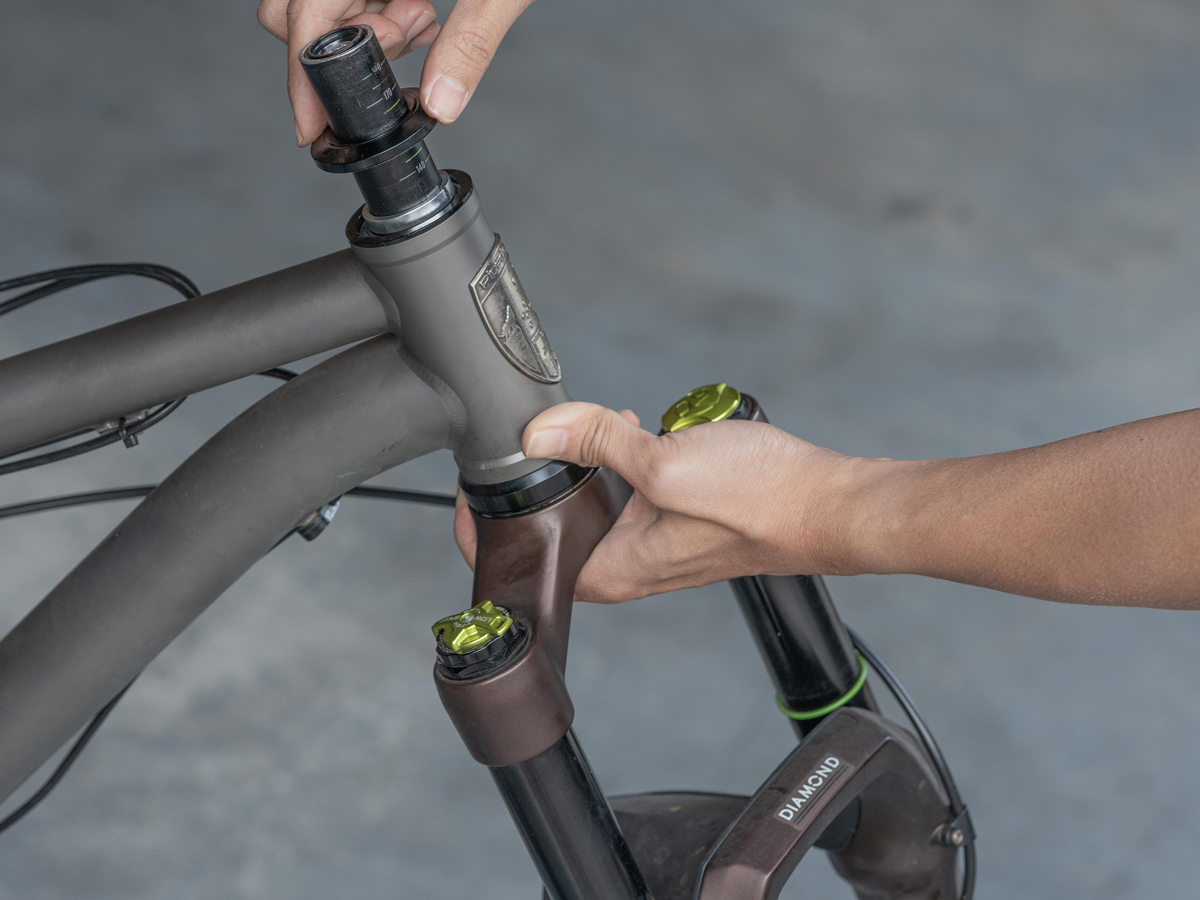
Apply a thin layer of grease on the bearings to prevent rust. Position the bearings in the upper and lower headset cups.
Carefully slide the fork into its place, ensuring that any washers, the compression ring, and seals are correctly positioned as per the headset’s design. Finally, attach the headset top cap. It’s important to ensure that all parts are aligned correctly to guarantee smooth fork operation and headset functionality.
Step 5: Install the Stem:
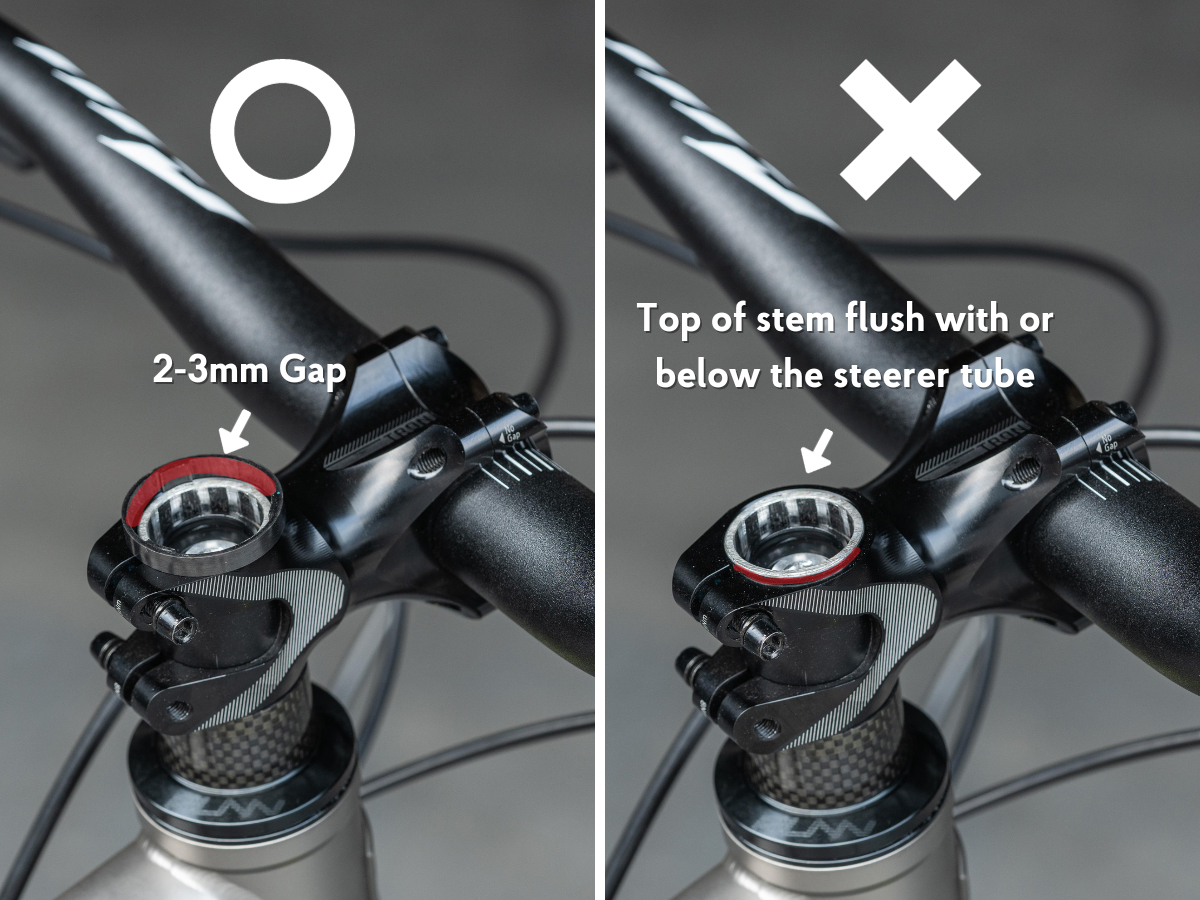
Mount the handlebar stem assembly onto the fork’s steerer tube, adding spacers as needed. Ensure there’s a 2-3mm gap between the top of the steerer tube and the topmost spacer or stem. This gap is crucial for the proper preload of the headset. If the gap is insufficient, add additional spacers. Conversely, if the gap is too large, reduce the number of spacers accordingly. Achieving the correct gap is essential for optimal headset performance and safety.
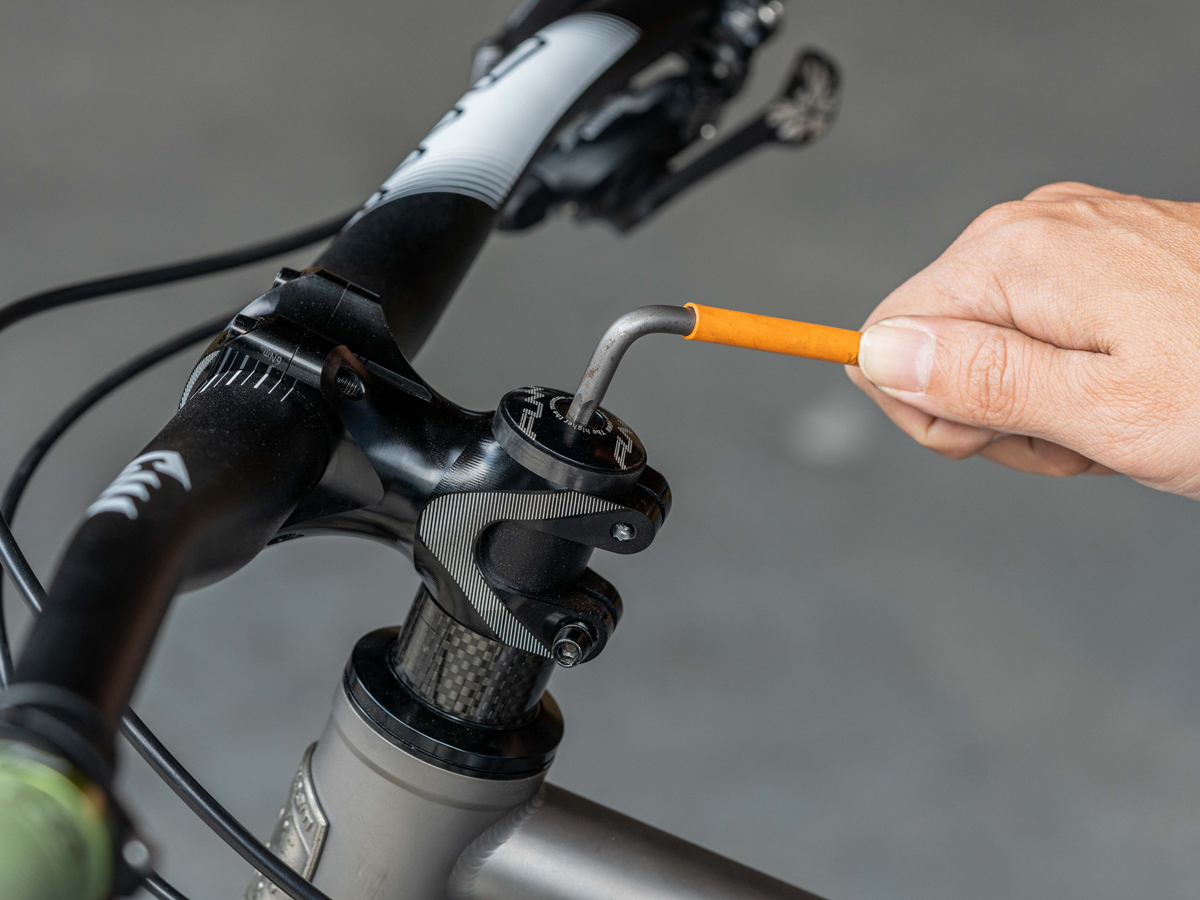
Step 6: Preload the Headset:
Position the stem cap on top of the stem, ensuring the steerer clamping bolts of the stem are loose. Tighten the stem cap bolt to preload the headset, aiming for a setup where the stem rotates smoothly without excessive friction. Verify that there is neither a gap nor any slack within the stem and headset stack.
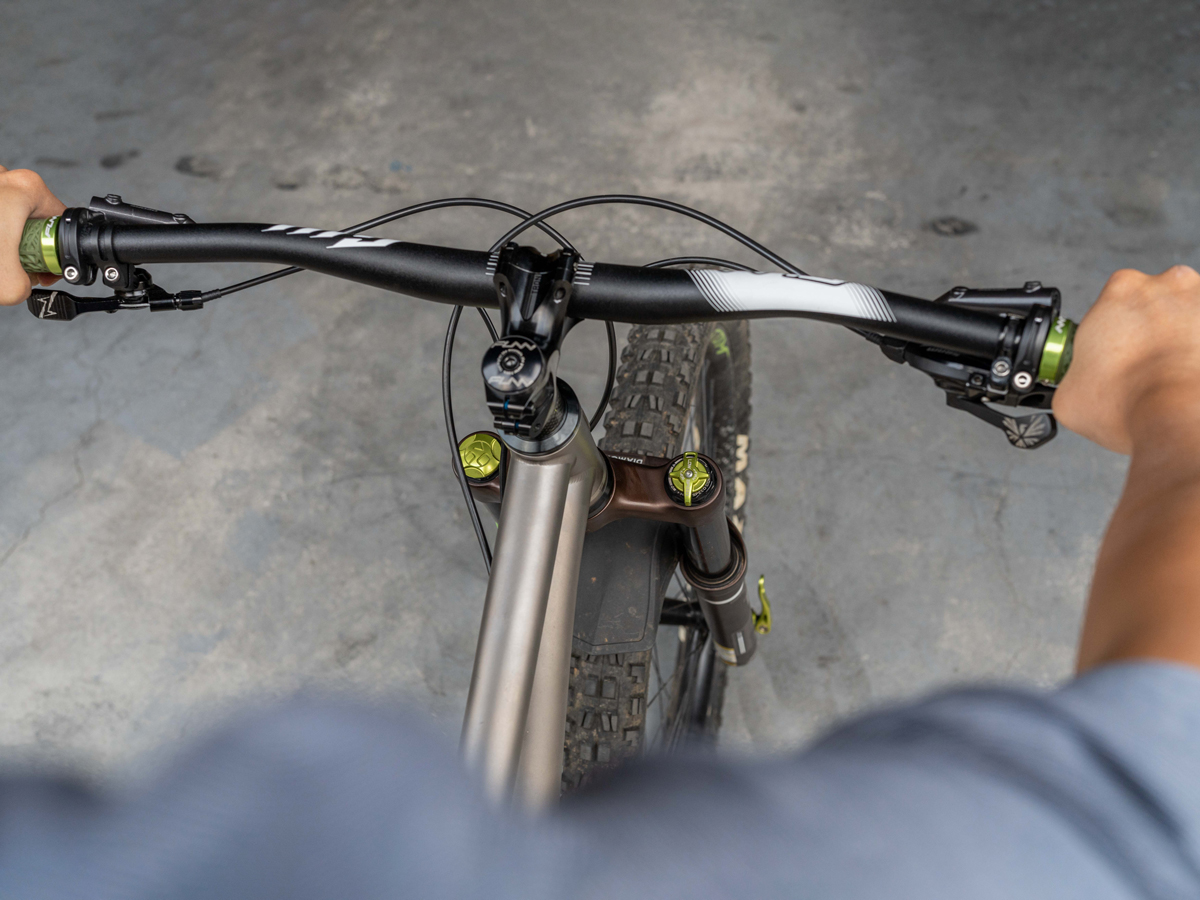
Step 7: Align the Handlebar and Tighten the Steerer Clamp Bolts
With the steerer clamp bolts slightly snug but not fully tightened, stand over the bike and look down at the alignment between the handlebars and the front wheel. To adjust alignment, gently grip the handlebars and turn them until they’re perfectly vertical to the front wheel. Fine-tuning may be required, so don’t rush this step.
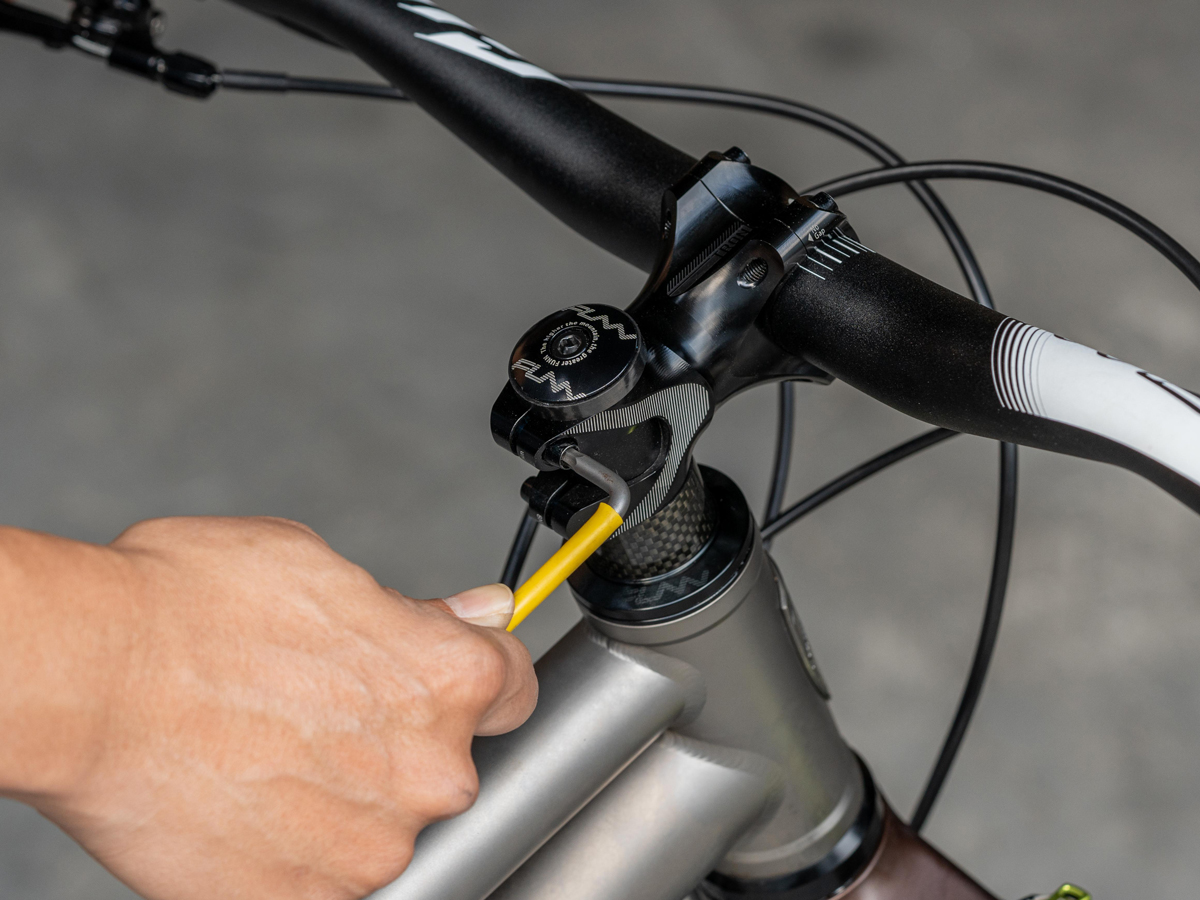
Once you’re satisfied with the alignment, tighten the steerer clamp bolts from one to the other. This helps ensure even clamping and reduces the risk of twisting or warping the stem. As always, adhere to any torque specifications. These are usually indicated on the stem or in the manual. When in doubt, tighten until snug but without using excessive force.
Step 8: Final Inspection:
After installation, ensure proper setup with a final check. Hold the front brake firmly and gently rock the handlebar forward and back to detect any headset play. The steering should feel smooth, without grinding or looseness. Confirm all bolts are tightened to manufacturer’s specifications for stability and responsiveness. Any unusual movement or noise warrants a recheck of the assembly for correct adjustment and security.
Conclusion
In conclusion, selecting and installing the right headset for your mountain bike is a crucial step in ensuring a safe, comfortable, and responsive riding experience. By following the detailed headset installation and selection guidelines provided in this blog, from choosing the appropriate headset to the final safety checks, you can confidently undertake this task. Remember, precision in measurement and installation is key. With the correct tools and a bit of patience, you can successfully upgrade your bike, enhancing your overall cycling performance and enjoyment.
RELATED ARTICLES:
Bike Headset Types Explained: An Introduction to the S.H.I.S
The Standardized Headset Identification System, or S.H.I.S. is like a special code that helps you figure out which headset you need for your bike. With the S.H.I.S., you don’t have to guess anymore – you can find the perfect fit easily.
Read More…

Easy Way To Install And Remove Bike Pedals | DIY Guide
Learning how to install and remove bike pedals is a must-have skill in your DIY maintenance toolkit. Not only does it empower you to understand your bike better, but it also gives you the freedom to customize your ride as you see fit.
Read More…

A Guide to Replacing Your Threadless Bike Stem
A well-chosen and properly installed stem can elevate your biking experience from merely tolerable to truly enjoyable. In our next section, we’re going to cover the unmistakable signs that your stem is crying out for an upgrade. You won’t want to overlook these clues.
Read More…